Cutting with scissors if a highly skilled perceptual motor activity that requires good coordination between the actions of the two hands, and requires many hours of practice to achieve the high level of skill required in school. In this article I take a look at how the two hands work together to cut paper using a pair of scissors.
Typically developing children enjoy cutting paper, and often engage in activities that require cutting shapes from paper. They also learn quickly from experience and generally do not need any specific guidance on how to hold and manipulate the scissors and paper.
Children with coordination difficulties on the other hand often find cutting with scissors tiring and frustrating and need specific help to acquire a good level of proficiency.
The different components of scissor cutting
Cutting paper with a pair of scissors involves several different actions that need to be coordinated.
1 The preferred hand grasps the scissors and uses mostly thumb movements to open and close the blades. The fingers move at the finger joint closest to the palm (called the metacarpophalangeal joint) while the other two joints are held steady and support the scissors.
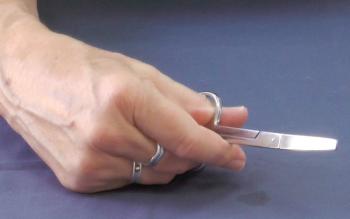

2 The hand that is holding the scissors (I will call it the cutting hand) needs to be positioned relative to the paper so that closing the blades cuts in the desired direction.
Children with good cutting skills will usually position the cutting hand so the blade is more or less at at a right angle to the body.
The scissor blades need to be positioned at a right angle to the paper so that closing the blades makes a clean cut and stop the paper slipping between the blades. This happens when the blades tip towards the paper.
3 The other hand (called the supporting hand) holds the paper in place and at the same time changes the position of the paper relative to the scissor blades so as to change the direction of the line of cutting

4 The supporting hand also needs to change its position on the paper from time to time. To do this supporting hand must let go of the paper briefly, while the paper is supported by closing the scissor blades just enough to hold the paper while the hand is moved.

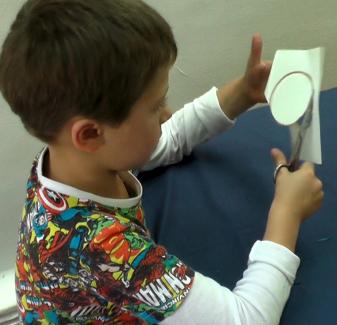
Sometimes the paper is supported by the cutting hand so that the supporting hand can be moved on the paper.

A simple activity to observe how your child coordinates the two hands
Cutting pieces off a narrow strip of thin card
In this activity the child cuts small pieces off a narrow strip of card. You can use the cut off bits of card to make a collage, using small balls of adhesive putty or glue to stick them down on the paper.
What the child learns in this activity
- To position the scissors and paper at right angles to each other, and ready to make the first cut.
- To cut along a line drawn on the paper
- To move the supporting hand on the paper.
You will need:
- a few strips of thin card, about 2 cm wide marked with vertical lines spaced 2cm apart.
- a pair of scissors


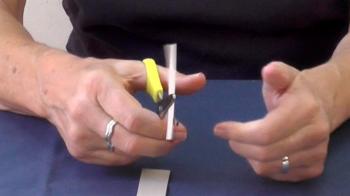
Demonstrate the cutting task
Demonstrate how you hold the paper with the supporting hand, and then cut across each line. The cut should be far enough so that the end piece drops off.
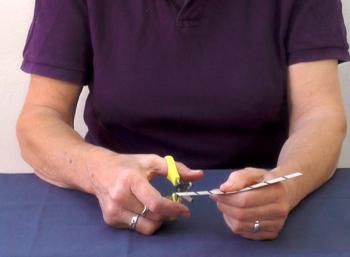
After cutting along several lines, you will need to move your supporting hand. To do this, hold the paper with the scissor hand, and move the supporting hand further along the strip of paper.

In this video clip you can see how I position and move my hands when cutting short and long lines across a piece of card. Because the card is quite stiff, the strips that are being cut off tend to get in the way. This is a good demonstration of how the thickness and stiffness of the paper can make the cutting task more or less difficult.
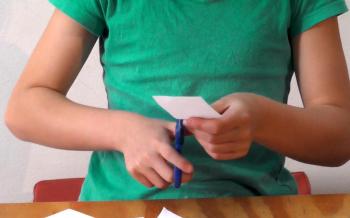
Let the child perform the task and observe
1 Let the child select the scissors he wants to use, as well as which colored strip he wishes to cut into pieces.
2 Can he open and close the scissor blades easily? Some children, and in particular those with hypermobile thumb and finger joints find opening and closing the scissors hard work You may want to just practice opening and closing the scissors. You hold the paper and let the child do the cutting.
3 Does the child hold the paper with his thumb on top and the fingers on the bottom side? If they holds the card with the palm facing down, it is best to show them how the correct the position. The instruction is "Hold the paper so that you can see your thumb".

4 Does the child hold the paper and scissors more or less at right angles to each other to produce a clean cut? This is a matter of experience and practice. It helps to have a pair of scissors with blades that are fairly sharp and are not loose so that they "wobble" slightly.
Let them cut up several strips of card to give them an opportunity to fathom out how to coordinate the actions of the two hands. Encourage them to cut close to the lines, but it does not have to be right on the line.
5 Does the child move their supporting hand along the card as needed? It may be helpful to prompt them to move the hand. You can also suggest that they move the hand every 2-3 cuts.
Graded activities for training scissor cutting.
Available to SfA subscribers
In this post I describe a series of activities to train scissor cutting for ever more complex tasks.
Subscribers can access this post here
For SfA Training Fitness and Coordination Guide subscribers
Subscribe here
Graded activities for training scissor cutting